Once you have established a connection to a server, you can now start transferring files between your computer and the remote FTP server.
In this example, we will go through the steps to upload a file to a website.
When creating a website, you have to upload your web pages to the FTP server so that the rest of the internet can view them via a web browser. One of the more common files you will deal with is an index.html file. This file is the first file that will be browsed when someone goes to visit your website.
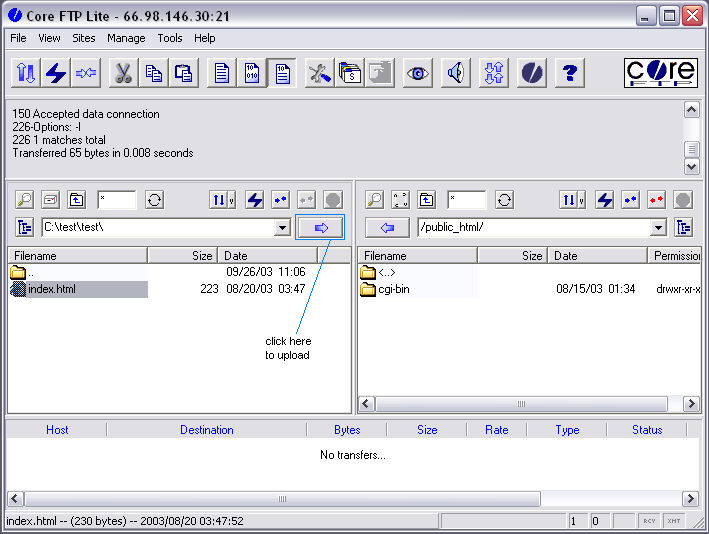
Your files on your computer are displayed in the local directory listing which is on the left side of the screen. This tutorial assumes you know how to locate your files on your hard drive. Many web page editors will put your files in your "My Documents" or other easy to find places.
To upload a file to the FTP server, all you have to do is select (hilight) the index.html file in the local directory listing, and then click on the upload button. You can alternatively right click on the selected file, and select upload, or click and drag the file over to the remote directory listing.
Once you have pressed the upload button, Core FTP will transfer the file to the remote server. When the transfer is complete, you should see the remote file in the remote directory listing. If the file has been uploaded to the server successfully, it can now be viewed in a web browser.
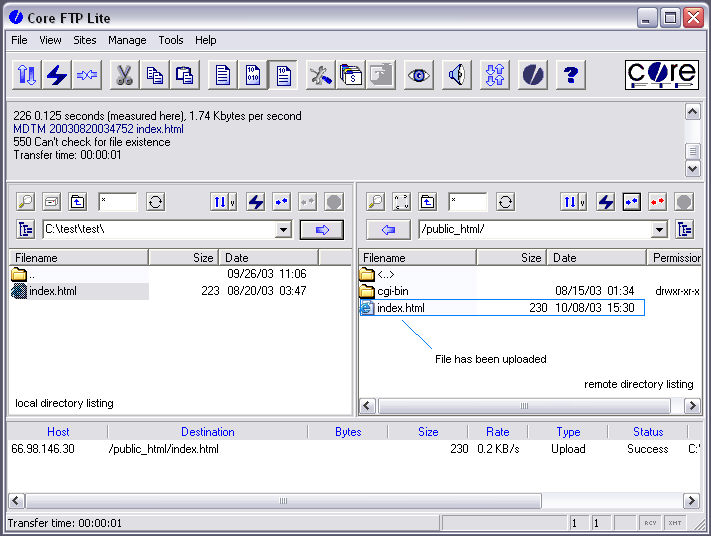
That's all there is to it! Assuming your domain is setup up and pointed to your FTP server's directory, you should see your html file displayed ( at http://www.yourdomain.com).
To download a file, simply select the files in the remote directory listing, and hit the download button.
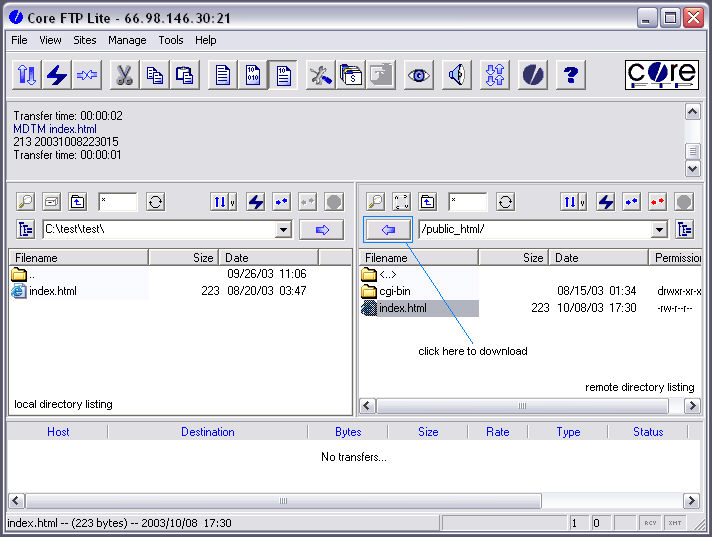
In this example, the file already exists in the local directory listing. Select 'overwrite' if you want to overwrite the file. Overwriting will replace the file. If you do not wish to overwrite the file, hit cancel.